Sensory Bottles

There are so many toys and gadgets out there that promote “learning” or “skills development” in infants. On top of that is all of the advice, “If you don’t do x by his first birthday you might as well quit now!” We don’t really need to go into examples; you all know what we are talking about.

With the excess of information it can be hard to sort through it all to figure out what works for you, but T decided to try one she’d read about – a sensory bottle. (M said – “a what???”) You may ask- Why make a sensory bottle when my kid is just as happy with the empty potato chip bag? It’s a good question. T’s son loves an empty chip bag, and it’s a super cheap toy. But she also wants to expose him to other sensory items and she loves to craft so why not.

After countless hours of googling and reading advice, T finally decided to give these sensory bottles a try. Mostly because she had all of the equipment at home and didn’t need to go to the store. M, for her part, doesn’t really “get” the sensory bottles. She understands the concept behind them, and admittedly thinks they are very pretty. But she disagrees with some of the advice that comes with them – “You must have your kids play with sensory bottles or they will never graduate from preschool!” M thinks sensory bottles might just be a new invention to stress out/guilt parents. Particularly working parents and/or parents with multiple kids. 🙂

So we give you this craft with our own advice: Do it because you like crafting, or because it’s fun, or because you wanted something to do with your kids. Don’t do it just because someone told you your kid would fall behind if he or she was not exposed to sensory bottles at a young age.

We are actually going to show you two slightly different bottles. The first one creates a “galaxy effect”. The second one is more of a traditional sensory bottle in that you can shake it and the items in the center float around like a lava lamp.

img_1590

Easy Basic Sensory Bottle

  • Glitter*
  • Clear Glue
  • Water
  • Plastic Bottle
  • Items to float (I used jewels, marbles, and purple mesh tubing

*M: Good Lord, Tanner, who wants glitter in their house???)

Step 1: Fill bottle about half way with water. Then pour in your entire bottle of clear glue. Close the cap on the bottle and shake until combined.

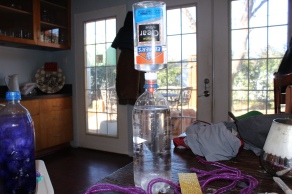
img_1566       img_1567

Step 2: Add some glitter and your objects to the bottle. Top off with water if needed.

Step 3: Seal the cap back on tight. (You can tape this down or glue it if needed.) Shake until glue and water are combined and Tah Dah!

img_1569

Galaxy Bottle

  • Plastic Bottle
  • Baby Oil*
  • Glitter
  • Purple and blue food coloring
  • Cotton balls
  • Straw
  • Water

*I used sunflower oil because that’s what I had. I think baby oil would be better.
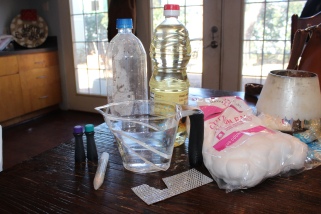
img_1554

Step 1: Fill a measuring cup with about 1 1/2 C. of water. Drop blue and purple drops of food coloring in until you get a nice indigo color (or whatever color makes you happy!) I used about 6 drops of purple and 4 drops of blue.

img_1556

Step 2: Fill your plastic bottle about half way with oil. Add your water so the plastic bottle is now about 3/4 of the way full. Secure the lid and shake until the water and oil have mixed some.

img_1558        img_1559

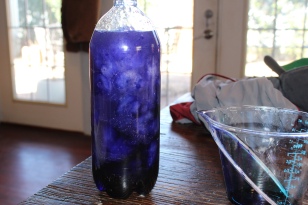
Step 3: Open it back up. Slightly unravel your cotton balls and start stuffing them in. I used the straw to push them to the bottom. I used about 1/3 of the bag of cotton balls.
img_1561

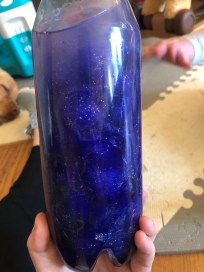
Step 4: Put your lid back on and shake until combined.
img_0362

** You can add other items to your galaxy if you want. Just use a little less water and oil so there is room. I added silver mesh tubing as something my son can find when playing with it.

Happy Crafting!

xoxo, T&M


Gingerbread Houses

We would have liked to post this weeks ago, but true to mom fashion, the holidays have been, well….chaotic. With an assortment of Christmas parties, Christmas programs, baking, shopping, school work, and adult work, it can be hard to fit it all in.

One tradition that many families try to squeeze in is the decorating of a gingerbread house. T loves the smell of freshly baked gingerbread in her home, but unfortunately hasn’t had the time to bake it. M has 5 kids and that would be a lot of houses to build. SO we decided to make our own spin on the gingerbread house (and by our own spin we mean we saw it on Pintrest and gave it a try!)

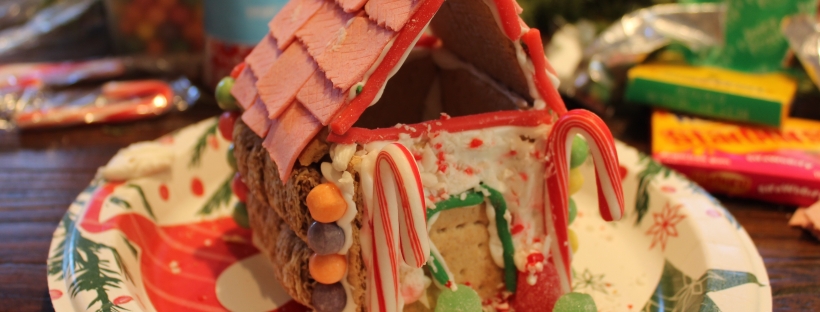
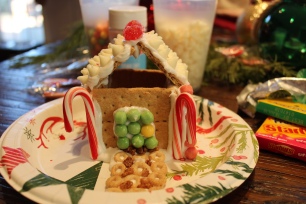
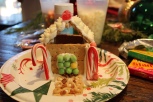
Graham Cracker “Gingerbread” Houses for the win!!!!!!!!!! These were SUPER easy, and took hardly any time at all. That is, of course, if you don’t count the clean up time. It took very little time and effort to get this set up though! T went to the store to buy the necessary elements, but she was profoundly disappointed in the lack of decorating materials this year. WHERE ARE THE GUMDROPS? WHERE ARE THE SNO CAPS?? So she was forced to improvise.

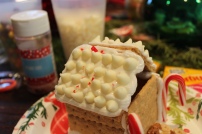
Need roof shingles? How about using some gum! Siding for your house? Wheaties do the trick! How about a beautiful walk way up to your front door? Give cereal a try! Most of the items T decorated with can be found in your home, but she did purchase things like: pull apart Twizzlers, Sweet tart balls, and candy canes.

Here is a list of your supplies:

  • Graham Crackers
  • Powdered Sugar (1 bag should produce enough for 3-4 houses)
  • 2 egg whites per bag of powdered sugar used
  • 1/8 C. of water
  • Zip lock bags
  • Decorating materials: cereal, gum drops, candy canes, twizzlers, jelly bellys, gum, white chocolate morsels, nerds, waffle cones (for a tree) just to name a few
  • Paper/plastic bowls and plates

First, you’ll want to go ahead and get all of your decorating supplies ready to go. We used little plastic cups to divide up the supplies. Then we used paper plates to build the houses on.

Second, break up those graham crackers the way you want them. We just broke our rectangles in half (bonus points for you if you can find the ones already in squares). Each house needs 6 squares. (Note: you can modify your design by leaving them as rectangles. You would need 4 rectangles and 2 squares. You can also use a knife to cut the graham cracker to a point on one side so there are not holes in the roof like ours)

img_1422

Third, make the icing! Using a mixer combine your powdered sugar and egg whites together. If it is too thick, slowly add the 1/8 C of water to thin out the consistency. If you accidentally make your icing too runny just add more sugar to help thicken it back up. You want the icing to be thick, but workable. This particular icing will harden quickly once used, which is great for these houses!

Fourth, divide the icing among your zip lock bags. Seal the bags. Then cut a TINY hole in the corner of the bag. (For you pros feel free to use an icing bag and tip, but the zip lock bags work great for kids, and you can just throw them out when you are done.

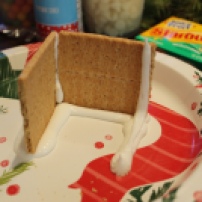
Fifth, time to get building! You will want to use the icing to make a square on the plate, then stick your graham cracker pieces in the icing. Be sure to ice up the edges of each graham cracker piece so they are glued to the plate and to each other. The roof is attached with icing on 2 of the top edges of your square and then with icing on the edges that connect in a point. Let it sit for 2 minutes to harden.

NOW THE GOOD STUFF! Decorate your house however you like! M’s kids seem to prefer creating houses suffering from natural candy disasters. Other people, like T, prefer more symmetrical houses.

All that really matters is that you have fun doing it.

Merry Christmas!

T&M

Wall Murals

Growing up my mom painted a rain forest/jungle mural on our play room wall. I vividly remember what it looked like. I also remember being traumatized when it was painted over. When I found out I was pregnant that was one of the first things I knew I wanted. I wanted my mom to paint a new mural in the baby’s bedroom!

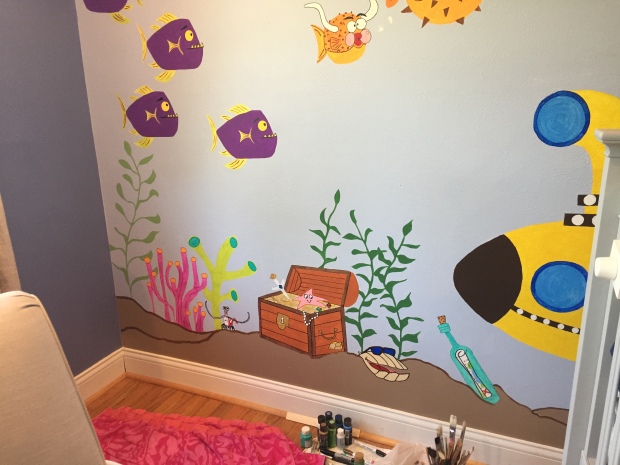
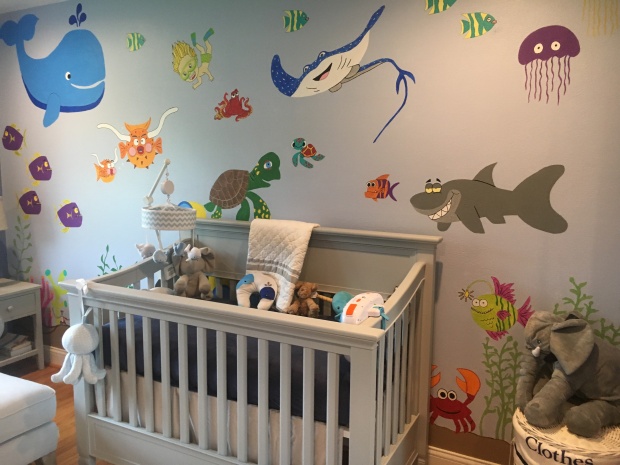
Throughout the duration of my pregnancy I referred to my unborn child as Baby Beluga…I may or may not still refer to him as that. I have a major love for all things whale. And his room now reflects that. He’ll probably grow up to hate whales, but I hope not! Anyway, my mom and I began discussing what I wanted. Definitely wanted an underwater scene. But did I want to see the waves and a boat on top? Did I want realistic looking fish or cartoon fish? What color blue? There were SO many decisions.

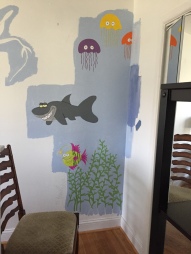
Before you get started it helps to have a pretty clear vision of what it is you are wanting. Do not start drawing or painting until you know. I decided I wanted it to be a little cartoony with lots of bright colors. So my mom got to work drawing the fish. There are several ways to do this. You can either 1) Freehand directly on the wall 2) you can freehand or trace your image on a smaller piece of paper and then use a projector to put it on the wall in the size you want. We did a mixture of both.

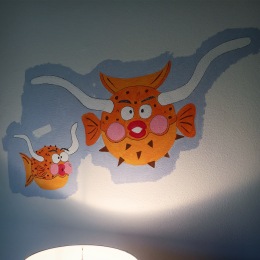
We google imaged different fishies and found ones we liked. We used a couple that reflected the characters in finding nemo, we found a couple we could trace that were just awesome looking. And then my mom found some that she then added features too. For instance, my husband is obsessed with all things University of Texas. So my mom found an awesome puffer fish but then added longhorns to it!

IMG_3636   IMG_3700

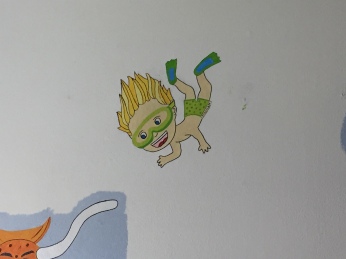
It’s one of my favorite parts of the mural. There are other fun hidden gems like the snorkeler’s shorts say Fordham my alma mater. She also found images for a submarine, treasure chest, message in a bottle and some other fun things.IMG_3936

Once we had all of our images it was time to start getting them traced onto the wall. (Note: You should Ideally be starting with a white wall). TAKE YOUR TIME! Make sure you get the images the size you want and don’t be afraid to erase if it’s not what you want or the right size. All of those pencil markings can be covered up with paint. We started on one side and worked our way across

.IMG_3694                  IMG_3626

Once we had a few images on the wall we started playing with the paint. We used regular acrylic paint for the smaller images and then a Sherwin Williams wall paint for the ocean. We would do a small area to make sure the color was what we wanted and then filled in. Almost every color needed more than one coat. But you MUST let it dry all the way before adding the second layer. We also found that using sharpies to outline the images or pieces of the images was super helpful, and made the images stand out.

IMG_3934

As I type this all out it seems like way more work than it actually was (not to downplay how much effort my mom put into it) But anyone can do this especially if you’re tracing! If anything it is really just time consuming. But it has made my son’s room SO fun and brings back memories of my own mural. I am SO SO SO happy we chose to do this for him too.

Good luck and happy painting!

P.S. if you did any fun painting projects in your playroom or nursery walls I would love to see them!